How to Organize your Wedding Guest List in Excel
Does it feel like your wedding planning to-do list never ends? How will you keep track of all of those RSVPs? Gifts? Food allergies?
If you’re feeling overwhelmed, then it’s time to learn how to organize your wedding guest list in Excel.
Be the bride who has it all together–the one who sends thank you cards on time and remembers Aunt Mae’s gluten allergy. Quickly pass along meal selections to your caterer. Know the names of every plus one. Make your seating plan in a snap.
Imagine how relieved you’ll feel when you can easily keep track of RSVPs, meal choices, phone numbers, and more–all in one place.
Today, I am spilling the beans on how to organize your wedding guest list in Excel. Not only is this useful for wedding invitation addressing, but it will also help you keep track of RSVPs and meal selections, get a final headcount before the big day, develop your seating chart, and write thank you notes.
Here’s how to organize your wedding guest list in Excel… or skip the DIY and get instant access to my Wedding Guest List Excel Sheet Template in the form below.
1| How to organize your wedding guest list in Excel.
Organizing your wedding guest list prevents last-minute headaches. That's why I recommend creating it in Excel or Google Sheets, rather than writing it down on paper or creating a Word document. Excel will allow you to keep all of your guest list details in one place–like meal selections, gifts received, and more–and you can keep track of every event too, from your bridal showers to your rehearsal dinner.
To get started, open up an Excel document on your computer. Next, create a columns such as:
Guest Name
Address
Phone Number
Email Address
Number of Guests Invited
RSVP Received
Dietary Restrictions
Gift Description
Those are just a few column suggestions, although your column names may vary.
2| Use separate columns for each: street address, city, state and zip code.
If you are having addresses printed, many professional print shops will require a separate column for the guest's name, street address, city, state and zip code. (This is how I set up envelopes for address printing!) If you already have this divided up in your original spreadsheet, it may save you the trouble of having to copy it over into a new form.
Otherwise, it's just a really nice, clean way to view all addresses without seeing everything jumbled together in one column.
3| Change zip code column cells to "zip code" or "text".
When a zip code begins with "0", Excel drops the zero. So if you have guests in the northeastern United States, a "01102" suddenly becomes "1102". Thankfully, there is a quick fix. In Excel, select the entire zip code column . Then click format > cells > special > zip code.
4| Have one column for "number of guests invited" and another column for "number of guests attending".
For those who are only allowing a certain number of guests per party, you'll need to include two columns to keep track of it all: one column for the number of guests invited and another column for the number of guests who are attending. That way you can easily keep track of how many seats you have reserved in someone's honor.
5| Include a separate column for the number of kids attending.
If your wedding is kid-friendly, be sure to include a column for how many children are attending. This will be helpful if you decide to do a kid's table and if you provide the option for a children's meal.
6| Get names of all guests–including the "plus ones".
Using the phrase "Guest of Mr. John Doe" on your seating chart or place cards can leave plus ones feeling awkward. And, hopefully, you will want everyone to feel comfortable and welcome at your wedding. It's feels much more personal. If a wedding guest is not sure who their plus one is yet, tell them to give you a name at least three to four weeks prior to the wedding date or when they RSVP.
7| List dietary restrictions required for guests.
If you have any guests with allergies or dietary restrictions, make note of it on your Excel document so you can easily pass it along to your caterer.
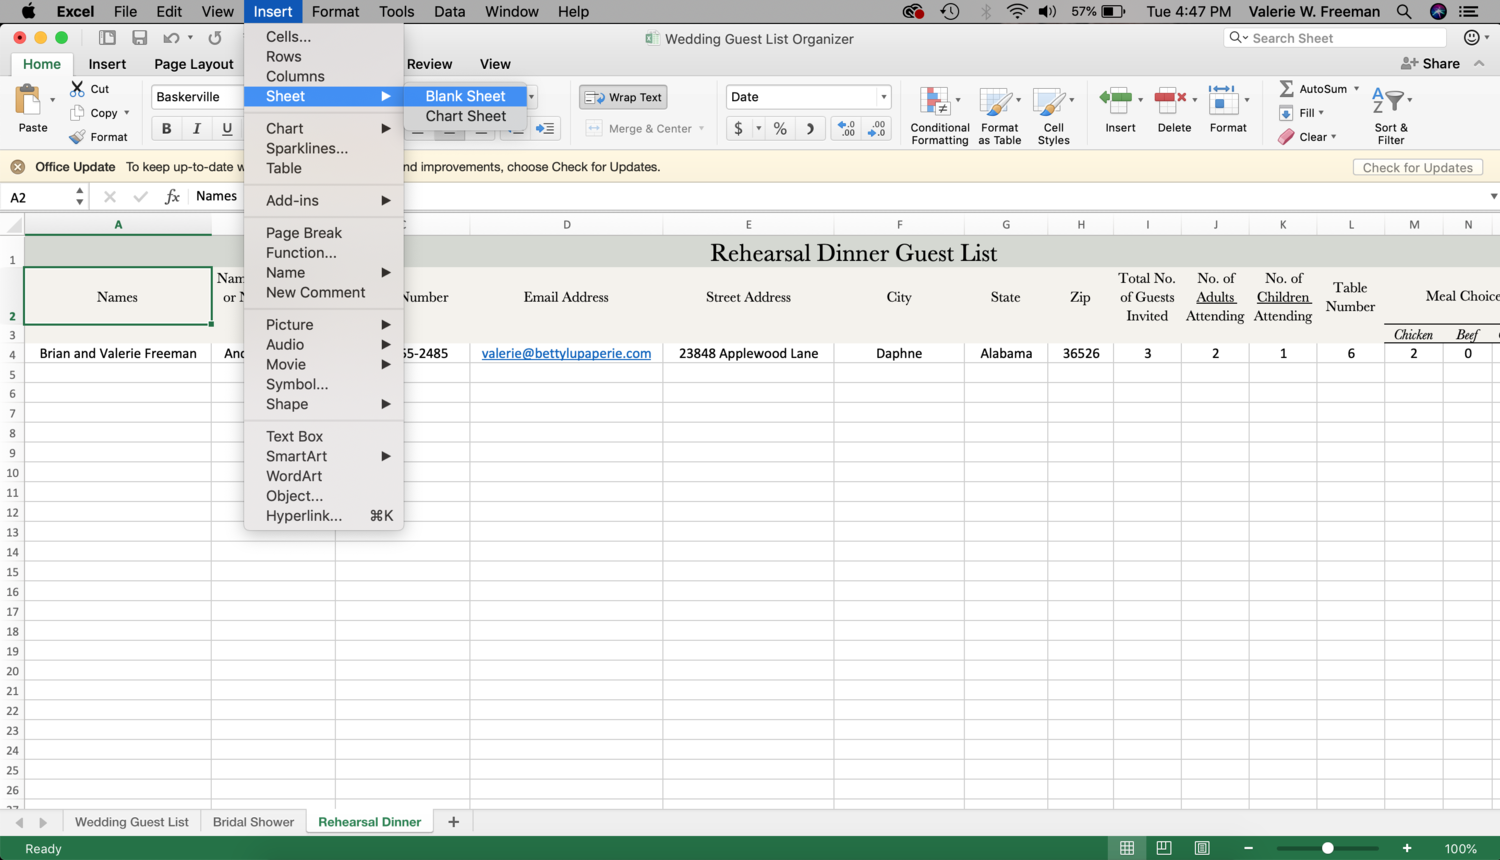
8| Create a new Excel "sheet" for each wedding event.
Separate each Excel sheet by event, like one sheet for “wedding”, one for “rehearsal dinner” and so on. This is a helpful way to keep track of guests who have attended your wedding showers, too, and is an especially useful for notating gifts from each guest. Plus, the hosts of each different event may ask for a guest list with contact information so they can send out invitations or other correspondence.
9| Turn your Excel sheet into a Google sheet for easy sharing.
You can easily share your wedding guest list details with anyone by converting your Excel sheet into a Google Sheet. Share your Google Sheet with your wedding planner, catering staff, or anyone else who is helping you plan the big day. It's a great way to keep everyone in the loop at all times.
Go to Google Sheets. From there, create a “new blank sheet”. To transfer your Excel sheet to Google sheets, click file > import > upload. Select the file you are looking for and click "create new spreadsheet" and then "import data". Finally, select "open now" and presto! Your Google Sheet is ready to go.
10| Keep track of your wedding guest list on the go.
If you decided to follow step 3, you or a friend can easily access your Google Sheet on the go with a cell phone. Just click the “share” button in the top right corner of your Google Sheet, type in your friend’s email address, and they will be sent access to your Sheet.
This way, you or a friend can easily add gift descriptions as you open gifts at your bridal party, quickly add an RSVP when you run into a guest at the grocery store, etc.
related blog posts

